Info
How to Make Homemade Ice Pack
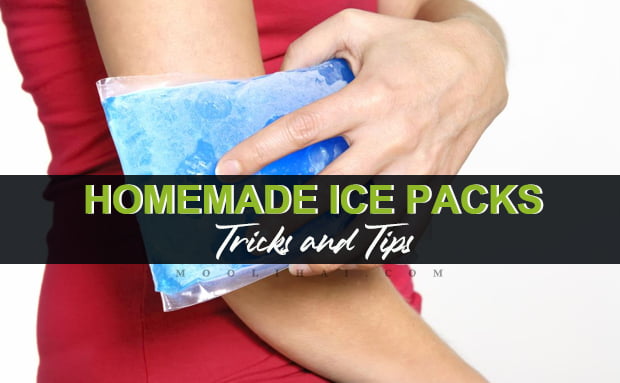
An ice pack is always an excellent home remedy, especially for people who have children in their home. Ice packs help to reduce the inflammation in the affected areas and reduce pain caused by minor injuries. You can make ice packs using different things from water to rice.
But there is a problem when using solid like rice to make an ice pack. The frozen rice is all lumpy, and it does not treat well in the injured area. Some reusable ice packs are also available in the markets. You can keep them in your freezer and refreeze them after usage. You can also make that effective ice pack at home.
While using alcohol to make an ice pack, it does not freeze it hard, so it will mold perfectly in the affected area. You can also keep the alcohol ice pack in the freezer and use it again and again. Usually, rubbing alcohol is commonly used to make ice packs at home. You can easily get the rubbing alcohol in medical stores.
How To make Homemade Ice Packs

Cold therapy is an effective low-cost way to reduce pain in your body, caused by injuries or inflammation. Here we provide some easiest ways to make reusable ice packs and to get quick relief from pain.
1. Homemade Rubbing Alcohol Ice Pack
Cold therapy is one of the excellent ways to treat neck and back pain. Using a gel ice pack is a great choice to treat this problem. It will mold perfectly in your body and so you can feel more comfortable while using it.
Ingredients :
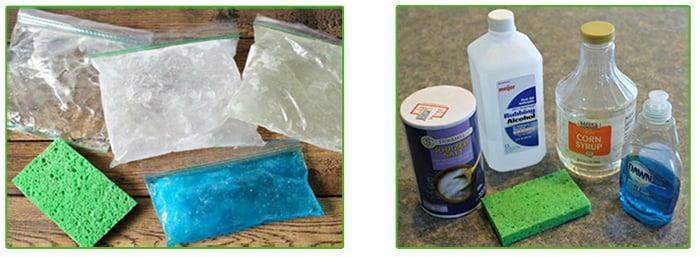
- 2 quart or gallon plastic bag
- 2 cup water
- 1 cup rubbing alcohol
Procedure :
- Fill the freezer bag with 2 cups of water and 1 cup of rubbing alcohol.
- Try to escape the air out from the bag as much as possible before sealing it.
- Keep that freezer bag in another plastic bag and place it in the freezer for an hour.
- Cover the freezer bag with a towel while using it to avoid skin burning.
2. Dish Soap Ice Pack
Using dish soap to make an ice pack is another simple homemade ice pack. Depending on the time the ice pack is kept in the freezer, it will be flexible, firmer, or icier. If you want to get a flexible ice pack, then keep it in the freezer for just 2 hours. If you keep the ice pack for more than 2 hours, then it will become icy and firmer. So the time period that the ice pack is kept in the freezer is also more important to get an excellent ice pack.
Ingredients :
- 2 ziploc bag
- 2 cup water
- 1 dish soap
Procedure:
- Put 2 cups of water and 1 dish soap into the Ziploc bag.
- Make sure that the air has got out from the bag before sealing it.
- Put this bag into another Ziploc bag and keep it in the freezer.
- Cover the ice pack with a towel while using. This avoids skin burning.
3. Corn Syrup Ice Pack
Corn syrup also helps to make a great gel ice pack. It will be very flexible, squishy and does not change its color or texture while freezing. It does not cause any harmful infection when the pack is accidentally punctured and also when the content spills outside.
You just get a little sticky when the content spills on your skin. Due to the flexibility of this corn syrup ice pack, it will effectively treat injuries and comfortably mold your wrists, knees, ankles, and other areas.
Ingredients :
- 2 Ziploc bag
- 1 bottle corn syrup
Procedure:
- Pour some corn syrup into the Ziploc bag
- Get the air out from the bag before sealing it.
- Now keep this bag in another Ziploc bag.
- Put it in the freezer for several hours.
- Cover the frozen bag with a towel while using it.
4. Salt Ice Pack
It is the cheapest DIY ice pack. You can use ordinary salt to make this ice pack. It effectively treats inflammation.
Ingredients :
- 2 quart size Ziploc bag
- 2 cup of water
- 2 tbsp salt
Procedure:
- Put 2 tbsp of salt and 2 cups of water into a Ziploc bag.
- Make sure that the air has escaped from the bag before sealing it.
- Keep this bag inside another Ziploc bag and put it in the freezer.
- Cover this ice pack with a towel while using it.
5. Sponge Ice Pack
You can also use clean sponges to make an ice pack. This ice pack is both a flexible and structured option to treat joint pain. But a sponge ice pack is just a short-term icing. This ice pack can be easily molded, so you can comfortably use it to treat small areas like the toe or finger. You can also create multiple ice packs at a time. When taking the sponges out from the freezer, it will be hard and firm, but it becomes flexible after some time.
Ingredients :
- Water
- Sponges
- Ziploc bag
Procedure:
- Make the sponge wet with water.
- Put the sponge in the Ziploc bag.
- Leave the air out of the bag and seal it.
- Keep the Ziploc bag in the freezer.
- Use that bag after 1 or 2 hours.
6. Rice Ice Pack
Using rice for an ice pack is a great idea because it will give a soft massage to the injured area and you can also use it to treat curved areas. Most of our bodies are not in a flat shape; using this ice pack, it is very easy and comfortable for your joints. Moreover, rice is used for both hot and cold treatments. The socks you are using to fill rice is 100% cotton; so you can use it for heat treatment.
Ingredients :
- Sock
- Rice
Procedure:
- Put the rice in a sock.
- Tie the end of the sock and put it in the freezer
- Wait for 3-5 hours and use it to treat inflammation and joint pain.
7. Frozen Fruit Chunks or Peas Bag
Freezing fruits or peas is a traditional icing method. Frozen foods effectively treat tender joints. Usually, frozen food ice packs are big, so you can use these ice packs to treat large areas like the knee, neck, shoulders, etc. But it is not suitable to treat small areas like fingers.
Making a frozen food ice pack using large products will allow you to use them for a long time; it will keep the chillness for longer periods.
Ingredients :
- Pea or fruits
- Ziploc bag
Procedure:
- Put the peas or fruits in the Ziploc bag.
- Let the air get out of the bag and seal it.
- Keep it in the freezer.
- Take the ice pack after several hours and use it to treat pains.
8. Washcloth Ice Pack
A washcloth ice pack is a reusable type. You can comfortably use this ice pack on your joints, and you can also customize the washcloth before putting it in the freezer. You can easily reshape this washcloth ice pack to use for joints. When you take the washcloth from the freezer, it will be very stiff at first; then it starts to melt and becomes more flexible, so you can use it to treat any part of your body.
Ingredients :
- Water
- Washcloth
- Plastic bag
Procedure:
- Dip the washcloth in water
- Keep the dipped cloth in the plastic bag.
- Escape the air out of the bag and seal it.
- Put it into the freezer.
- Wrap the plastic bag after taking it out from the freezer and keep it on the skin for better pain relief.
9. Water Bottle
You can also use a filled water bottle as an ice pack. When you want to put an ice pack on the larger and flatter area of your body, like the back, you can use the water bottle as an ice pack. Simply freeze water in the bottle for 2 hours and use it as a water bottle ice pack. This frozen water bottle is a good choice to treat the back of your hand or forearms. Another benefit of using the frozen water bottle is, the chillness will stay for a longer period than other ice pack methods
Homemade Ice Packs Tricks and Tips

Both the quart-size Ziploc bags and gallon-size Ziploc bags are used in making ice packs. The ice packs made by using quart size Ziploc bags are in square shape, and the ice packs made using gallon-size bags are narrow and large. Using a gallon size bag for an ice pack is a better choice, because the narrow and large packs are very flexible, so you can easily wrap in the body parts.
The result of alcohol ice packs differs, based on the alcohol you have chosen for ice packs. Rubbing alcohol contains 70% alcohol, and Everclear contains 95% alcohol. While using Everclear for the ice pack, you have to freeze the inner bag first to ensure its flexibility, before doing double bagging. The general rule is using more alcohol is equal to a slushy ice pack.
Bottom Line
One of the best home remedies to treat injury is using an ice pack. It helps to reduce pain and swelling. Using ice packs often 24-48 hours will help to speed up the recovery process. You can try any one of the ice packs that we mentioned above for best results. Don’t use the ice pack directly on the skin, it may burn your skin, so cover the ice pack with a towel before using it.


Ponnatharam Stone (Raw) | For Permanent Hair Removal
Vengai Paal | Black Bindi | Dhrishti Pottu | Vengai Pottu for Babies | 100% Natural
Dried Avaram Senna Flower / Cassia Senna Auriculata / Aavaram Poo / Tarwar / Amaltas Leaves / Senna Auriculata / Avaram Poo / Sanay / Alexandrina / Tanner’s Cassia flower
Natural Dried Moringa Flower – Moringa Oleifera – Drumstick Tree Flower – Murungai Poo – Munagaku Flower
Akasa Garudan Kilangu / Redfruit Creeper / Corallocarpus Epigaeus
Original Edible Camphor | Pacha Karpooram | Bhimseni Camphor
Pure Ponnatharam Powder For Hair Removal
Saussurea Obvallata Seeds / Brahmakamal Seeds / Queen of the night / Sacred Saussurea Kon Kapfu / Brahma Kamalam / Nishagandha
Insulin Leaf Powder / Chamaecostus Cuspidatus / Costus Pictus / Spiral Ginger / Insulin Powder / Costus Igneus
Kaunch Beej Powder |Poonaikali | Velvet Bean Powder | Mucuna Pruriens | Kapikacchu | Natural Nervine Tonic & Muscle Builder
Achu Pottu for Babies | Bindi Mould Set | Baby Seratta – 1 Set
Aalam Pazham / Banyan Fruit Powder / Ficus Benghalensis / Marri Palu / Bargad / Dodda Alada Mara / Peraal / Vat Vriksha Powder